DIY Cold-Storage Root Cellar: 6 Build Plans
We may earn a commission for purchases made using our links. Please see our disclosure to learn more.
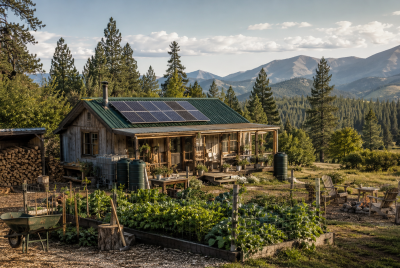
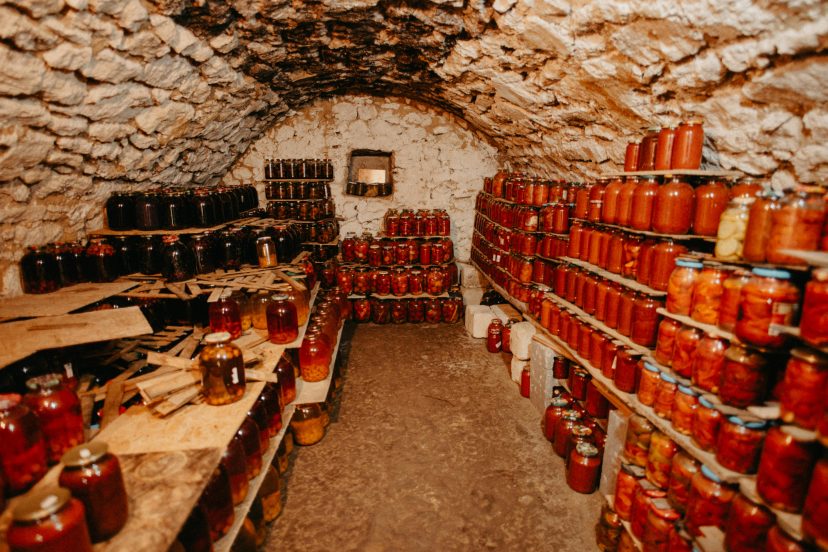
Have you ever grown more vegetables than your fridge can handle? Imagine piles of potatoes softening too soon, carrots drying out, and apples losing their crunch before winter even begins. It’s disheartening to see all that hard work go to waste. To solve that problem, you might want to consider a DIY cold-storage root cellar. By using the earth’s natural coolness and humidity, you can keep your harvest fresh for months without relying on electricity. It’s an old-fashioned idea that still makes perfect sense today — practical, sustainable, and deeply rewarding for any homesteader who values self-reliance.
What Is a Cold-Storage Root Cellar?
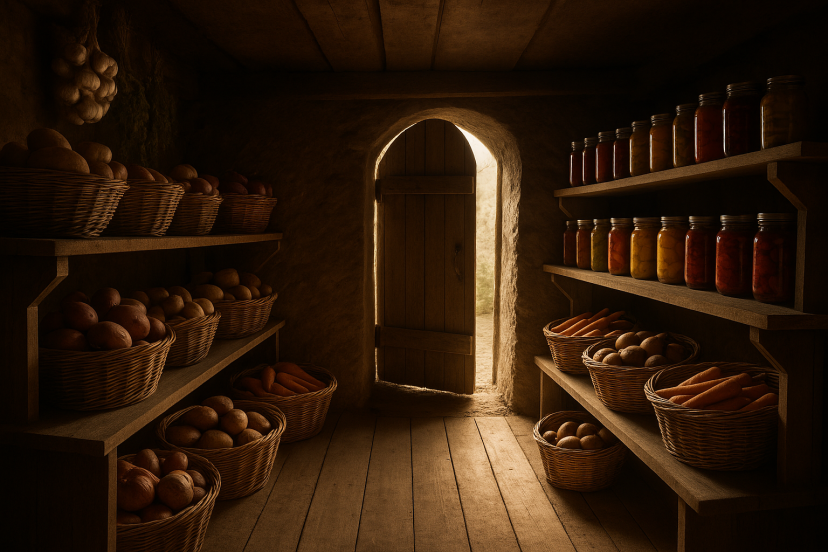
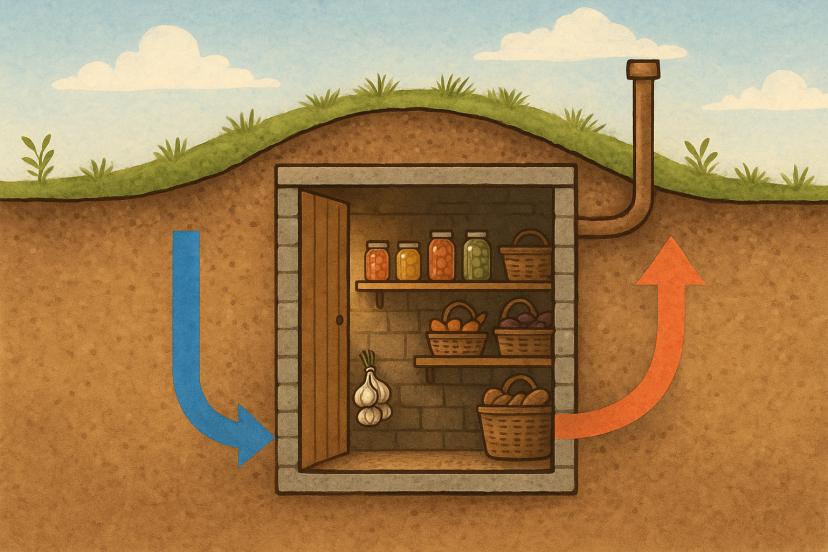
A root cellar is an underground or partially buried storage area that maintains cool, stable temperatures and moderate humidity — perfect for preserving crops such as potatoes, carrots, onions, apples, and garlic. It works by leveraging the natural insulation of the earth to regulate temperature without mechanical refrigeration.
Studies by agricultural researchers show that most root vegetables store best between 32°F to 40°F (0°C to 4°C) with 90–95% humidity, conditions easily achieved in a properly designed cellar.
How a Root Cellar Keeps Your Harvest Fresh
To truly understand why a DIY cold-storage root cellar is such a powerful homesteading tool, it helps to look at the science behind it. A root cellar works on a beautifully simple principle — using the earth’s natural insulation and humidity to preserve food the way early farmers did, long before electricity existed.
After harvest, vegetables and fruits are still alive — they continue to respire, slowly consuming stored nutrients and releasing carbon dioxide, moisture, and heat. The problem? Warm, dry air speeds up that process, leading to faster spoilage. A root cellar slows down respiration by keeping produce in a cool, humid, and dark environment, helping extend freshness for weeks or even months.
According to Rootwell’s research on root cellar storage, the surrounding soil naturally maintains a stable temperature, which reduces fluctuations that can harm stored crops. The earth acts like a giant thermal battery — absorbing heat during the day and releasing it slowly, keeping your cellar within the ideal 32°F–40°F (0°C–4°C) range.
Likewise, Build With Rise explains that soil is a poor conductor of heat, meaning it prevents sudden temperature swings and helps maintain steady humidity. This natural equilibrium allows root cellars to act as eco-friendly refrigerators, minimizing the need for energy while maximizing shelf life.
The Key Mechanisms at Play
| Component | Function | How It Works |
| Thermal Insulation | Maintains steady temperature | The surrounding soil keeps the cellar cool year-round, even when surface temperatures change drastically. |
| Humidity Control | Prevents wilting or mold | Natural moisture in the ground and proper ventilation help maintain 85–95% humidity — ideal for root vegetables. |
| Ventilation System | Manages airflow and gas levels | Dual vents allow cool air in and warm air out, balancing oxygen and preventing spoilage. |
| Light Exclusion | Slows sprouting and decay | Darkness keeps potatoes and onions from sprouting and preserves nutrients. |
When all these factors work together, your cellar becomes a self-regulating storage environment. No electricity. No noise. Just nature doing what it does best — preserving your hard-earned harvest with balance and simplicity.
Benefits of Building Your Own Root Cellar
- Energy-Free Preservation: Keeps produce fresh without refrigeration.
- Sustainability: Helps cut down on food waste while lowering your overall carbon impact.
- Cost-Effective: One-time build, long-term savings.
- Emergency Readiness: Provides backup storage during power outages.
- Flavor Retention: Cool, dark spaces help maintain natural flavors and nutrients.
6 DIY Cold-Storage Root Cellar Build Plans
1. Classic Underground Root Cellar
Best for: Homesteads with sloped or hilly terrain.
This traditional design uses a fully underground chamber with a venting system for airflow. Construct walls with stone, concrete blocks, or reinforced earth. Add a solid wooden door with insulation to keep the interior cool and dark.
Pro tip: Incorporate a floor drain to handle excess condensation and moisture.
2. Barrel-In-The-Ground Cellar
Best for: Small gardens or limited space.
All you need is a large plastic or metal barrel, buried vertically into the ground. Cut a top opening for access and cover it with insulation material like straw or wood.
This minimalist design can store root vegetables for several months, ideal for beginners or those testing cellar conditions before building bigger.
3. Concrete Block Cellar
Best for: Long-term, durable storage.
Construct walls using concrete blocks with rebar reinforcement for stability. Line the interior with a vapor barrier and apply a thin layer of lime plaster to prevent mold.
Ventilation tip: Install both intake and exhaust pipes for natural airflow — one low, one high — to maintain humidity and temperature balance.
4. Earthbag Root Cellar
Best for: Sustainable builders and eco-conscious homesteaders.
Using polypropylene bags filled with soil, you can create curved, dome-like walls that naturally regulate temperature. Top it off with an earth-covered roof and wooden entryway.
According to a 2022 study on sustainable building methods in Frontiers in Built Environment, earthbag construction offers exceptional insulation and longevity when exposed to natural conditions.
5. Converted Basement Corner Cellar
Best for: Urban or suburban homesteads.
If you have a basement, convert a corner into a mini root cellar using insulated walls and a simple ventilation system. Use thermal curtains or insulated doors to separate it from the rest of the house.
Bonus tip: A small dehumidifier can help control moisture in more humid climates.
6. Bunker-Style Cellar With Timber Frame
Best for: All-season use and large harvests.
This design resembles a storm shelter — strong, insulated, and built partially above ground with a sloping soil cover. Use treated wood beams and earth backfill for protection against temperature extremes.
Include shelving made of untreated wood and keep aisles wide enough for easy movement and ventilation.
Key Building Tips for Success
- Ventilation is vital: Always include two vents for air circulation.
- Check your soil type: Sandy loam drains well; clay retains too much moisture.
- Insulate thoroughly: Use straw bales, foam board, or natural fibers.
- Add a thermometer and hygrometer: Track conditions regularly.
- Keep pests out: Seal cracks and use fine mesh screens on vents.
Top 5 Products for Your Root Cellar Project
- ThermoPro TP65 Digital Thermometer and Hygrometer – Track cellar temperature and humidity levels accurately.
- BORA-Care Wood Treatment – Protects your timber framing from rot and insects naturally.
- VIVOSUN Inline Ventilation Duct Fan – Helps maintain airflow in small or enclosed root cellars.
- Rubbermaid 40-Gallon Storage Tub – Perfect for storing bulk vegetables or sealed produce.
- LED Motion Sensor Light (Battery Operated) – Adds convenient, energy-free lighting when you step inside.
Conclusion
A DIY cold-storage root cellar isn’t just a project — it’s a commitment to sustainable, self-reliant living. Whether you’re preserving your autumn harvest or preparing for the colder months, building one helps you connect with the rhythm of the seasons and reduce dependence on electricity. Just remember — the right tools make every build easier. From digging to sorting your stored crops, a durable gardening apron keeps your work organized and mess-free. With thoughtful design and simple materials, you can create a cellar that blends old-world wisdom with modern practicality — keeping your food fresh, your hands busy, and your homestead thriving all year long.
FAQs
1. How deep should a root cellar be?
Ideally, at least 8–10 feet deep to stay below the frost line and maintain steady temperatures.
2. Can I build a root cellar without a hill?
Yes! You can construct a partially buried or basement-style cellar with proper insulation and ventilation.
3. What level of temperature is ideal for a root cellar?
Between 32°F and 40°F (0°C–4°C) with high humidity (85–95%) for most root vegetables.
4. What’s the best way to manage humidity inside a root cellar?
Use damp sand, straw, or gravel on the floor to retain humidity and ensure airflow to prevent mold.
5. Can I use my cellar for canned foods?
Absolutely. Just keep canned goods on higher shelves to avoid excess moisture and store vegetables below.