How To Build Your Own Solar Dryer
We may earn a commission for purchases made using our links. Please see our disclosure to learn more.
When you’ve worked hard to grow your own fruits, vegetables, or herbs, the last thing you want is to watch them spoil before you can use them. The problem? Storing fresh produce without electricity or refrigeration can be tricky—especially for homesteaders aiming to live off-grid or reduce energy bills. But here’s the solution: building your own solar dryer gives you a simple, sustainable way to preserve food using nothing but sunlight and airflow. It’s cost-effective, easy to build, and allows you to enjoy your harvest all year long without relying on store-bought dehydrated goods or chemical preservatives.
Why Build a Solar Dryer?
When you rely on your harvest to feed your family or support your homestead, losing crops to spoilage isn’t just frustrating—it’s a waste of time, effort, and money. A solar dryer helps you avoid that by offering a faster, cleaner, and more dependable way to preserve food using just the power of the sun.
Unlike open-air drying, which leaves your produce at the mercy of weather, bugs, and dust, a solar dryer creates a protected space with steady warmth and good airflow. That means quicker drying times, better food safety, and a higher-quality end product—without the need for fuel or electricity.
Using one can also stretch your food supply further. You can dry herbs, fruits, veggies, or even fish to enjoy long after harvest season. Some homesteaders even use solar drying to sell preserved goods at markets or during off-seasons, turning surplus into income.
Another big win? It’s sustainable. You’re cutting down on energy use, reducing food waste, and relying more on nature than machines. Plus, solar dryers can be scaled to your needs—from small backyard setups to larger systems for family farms.
In short, building a solar dryer means fewer losses, lower costs, and more control over your food—exactly what self-reliant living is all about.

How Solar Dryers Work
At its core, a solar dryer traps solar energy and uses it to create a warm, well-ventilated chamber. This heat, combined with airflow, slowly removes moisture from food items placed inside. It’s faster than sun drying on trays and much cleaner too.
Here’s how it works:
- A transparent cover (like a polycarbonate sheet) allows sunlight to enter.
- Inside, a black surface absorbs the sunlight and converts it to heat.
- Vents at the bottom and top allow air to flow through, carrying moisture out.
- The food is spread out on mesh trays that allow air to pass from all sides.
Because the food isn’t exposed directly to wind, insects, or debris, the drying process is more hygienic and consistent. The end result? Long-lasting dried food with better color, flavor, and nutrition.
Materials You’ll Need
All of the products listed below are available on Amazon for convenience.
Basic Supplies:
- Clear Polycarbonate Sheet – lets sunlight in and traps heat.
- Black Aluminum Sheet or Matte Black Spray Paint – absorbs and radiates heat.
- Plywood or 2×4 Lumber – for building the frame and support.
- Drying Trays or Food-Grade Mesh – holds your produce securely.
- Thermometer or Hygrometer – keeps track of temperature and humidity.
- Insect Netting or Screen Mesh – keeps flies and pests away.
Optional upgrades:
- Small solar-powered fan to boost airflow on humid days.
- Adjustable legs or stands for better sun positioning.

Simple Steps How to Build Your Own Solar Dryer
1. Plan Your Design
Start with a simple box structure—roughly 3 to 4 feet long, 2 feet wide, and about 2 feet high. Make sure it slants toward the sun. A 30–45° angle is ideal for most locations.
You can sketch your own blueprint or follow a free plan online. Just keep airflow, sunlight, and food safety in mind.
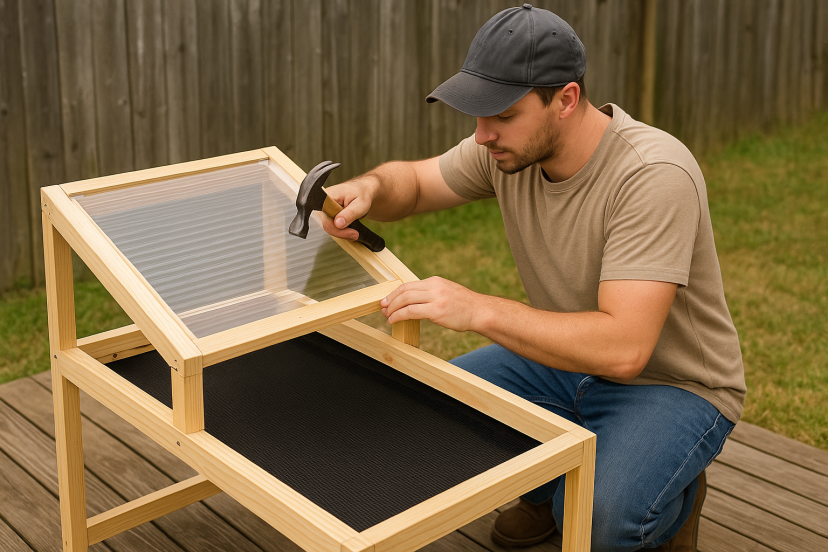
2. Build the Frame
Cut and assemble your wood to form the base and sides. Use screws for better durability. You want a sturdy but portable box.
3. Install the Heat Absorbing Base
Line the bottom with black aluminum, or paint it matte black. This surface will soak up sunlight and radiate warmth inside the dryer.
4. Attach the Clear Cover
Place the polycarbonate sheet over the top opening and secure it tightly. This transparent lid acts like a greenhouse, letting sunlight in and trapping the heat.
5. Add Ventilation
Cut out vents near the base and at the top of the back wall. Air should enter from the bottom, rise as it warms, and exit at the top. Cover vents with mesh to keep bugs out.
6. Insert Your Trays
Stack food-safe mesh trays inside the chamber, leaving space between each for air circulation. You can use wood supports or metal rails.
7. Check Your Temperature
Use a thermometer to ensure temps inside stay between 110°F and 140°F. If it gets hotter, you can open vents more or add shade.
8. Test It Out
Before drying real food, run a test batch with apple slices or herbs. This will help you fine-tune airflow and positioning.
Tips for Effective Solar Drying
Slice Evenly – Uniform thickness ensures even drying.
Pre-treat Fruits – Dip fruits like apples or peaches in lemon water to prevent browning.
Dry in Batches – Don’t overcrowd trays. Leave room for air to move.
Rotate If Needed – In the first few hours, rotate trays or adjust position for even sun exposure.
Store Smart – Once fully dried, store your food in airtight jars or vacuum-sealed bags. Store your dried goods in a dark, dry area away from heat and sunlight.
Benefits of Using a Solar Dryer
Why go solar instead of buying an electric dehydrator? Here’s why more homesteaders are making the switch:
No Electricity Needed – Perfect for off-grid setups, power outages, or remote areas.
Preserves Nutrients – Gentle heat helps retain vitamins and enzymes that get destroyed in ovens or electric dryers.
Protects From Contamination – No dust, flies, or bird droppings—unlike traditional sun drying.
Cost-Effective – Build it once, and you’ll save on power bills and food waste every season.
Eco-Friendly – Uses free, renewable solar energy—no emissions, no guilt.
Research-Backed Insights on Solar Drying
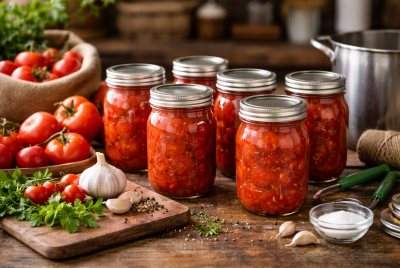
Solar drying is backed by science for its efficiency and food quality benefits. A study on sustainable food preservation found that solar dryers help retain more vitamins, better color, and flavor than open-air methods. Another 2024 study on solar dryer performance showed up to 94% moisture loss in tomatoes and cleaner, safer drying with no dust or insects. It also found the system pays for itself in under two years—making it a smart, reliable choice for homesteaders.
Final Thoughts
Building your own solar dryer is more than just a DIY win—it’s a smart move toward food freedom and energy savings. It’s low-cost, off-grid, and backed by research to preserve more nutrients and flavor. Plus, it fits right into the bigger picture of self-sufficiency. If you’re exploring ways to live closer to the land, check out this guide on homesteading farming for more ways to grow, preserve, and thrive. A solar dryer is just the beginning.
FAQs
1. How long does food take to dry in a solar dryer?
It depends on the weather and food type. Fruits take 1–3 days; herbs dry within a few hours. Always test for dryness before storing.
2. Can I dry meat or fish in a solar dryer?
Yes—but be cautious. Make sure temperatures stay consistently above 140°F and follow safe food preservation guidelines to avoid bacterial risks.
3. Do I need to add a fan?
Not necessarily. A well-designed vent system will provide enough airflow. But if you live in a humid area, a small solar fan can help speed things up.
4. How does a solar dryer compare to an electric dehydrator?
It depends on your goals. Solar dryers are energy-free and eco-friendly. Electric models offer more control but use power and cost more upfront.
5. How do I protect the solar dryer during bad weather?
Use a weather-resistant cover or move it under a shed roof. Always bring it indoors during heavy rain or strong winds.