Vermicomposting Made Easy: 5 Tips For Beginners
We may earn a commission for purchases made using our links. Please see our disclosure to learn more.
What if your kitchen scraps could help you grow healthier vegetables instead of filling your trash can? That’s exactly what vermicomposting makes possible.
This simple composting method uses worms to break down organic waste into a valuable soil amendment. Getting started doesn’t require a spacious yard, costly tools, or extensive gardening knowledge.
For homesteaders, vermicomposting offers a practical way to recycle food waste, improve garden soil, and make better use of everyday resources. With a suitable container and a little attention, you can establish a productive worm composting system.
These five practical tips will help you build a successful worm composting system from scratch.
What Is Vermicomposting and How Does It Work?
Vermicomposting relies on composting worms and beneficial microorganisms to transform organic waste into a nutrient-rich soil amendment.
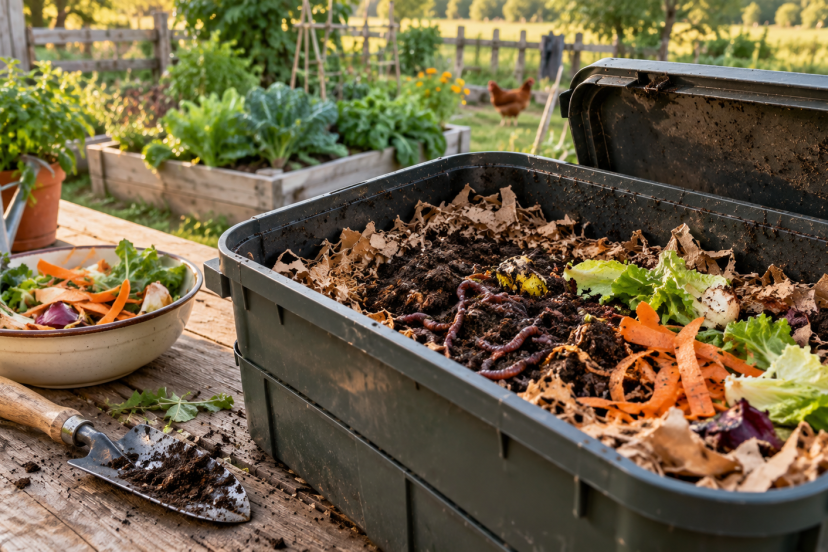
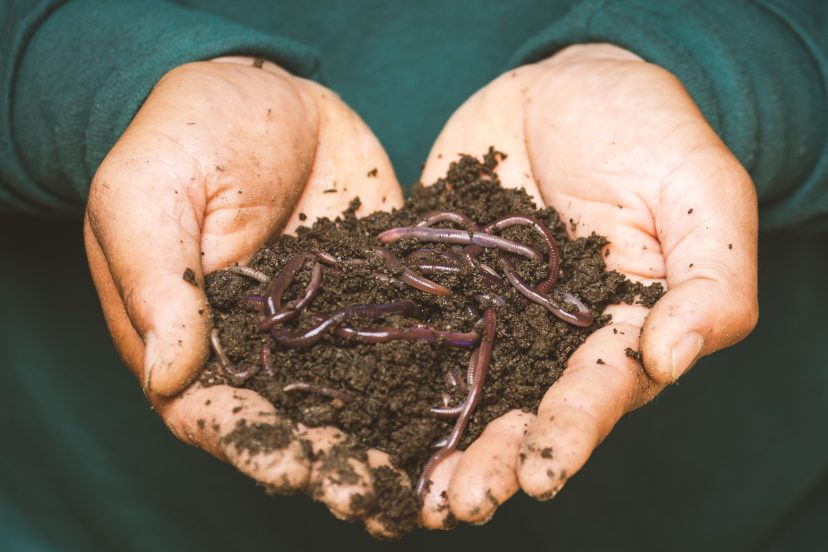
As worms consume decomposing food scraps and bedding, they produce castings. These dark, crumbly materials contain organic matter, plant nutrients, and beneficial microorganisms.
Unlike traditional hot composting, vermicomposting doesn’t require building a large pile or regularly turning materials to generate heat.
According to Oregon State University’s research-based guide to composting with worms, vermicomposting works well in small spaces and produces compost that can improve garden soil.
The process is straightforward: provide worms with appropriate bedding, food, moisture, and airflow. Over time, they help transform organic leftovers into useful compost.
Why Vermicomposting Is Great for Homesteaders
Homesteading often involves finding practical ways to reduce waste and reuse valuable resources. Worm composting is a practical addition to a homesteading routine focused on reducing waste and making the most of available resources.
Instead of throwing away vegetable peels, coffee grounds, and other suitable scraps, you can turn them into an amendment for your growing space.
Several benefits make vermicomposting appealing:
- Less household waste: Recycle suitable kitchen leftovers instead of sending them to landfills.
- Better soil: Add organic matter that supports soil structure and moisture retention.
- Limited space requirements: Keep a small bin in a garage, shed, or protected outdoor area.
- Low startup costs: Build a DIY system using a suitable container and recycled bedding.
- Year-round potential: Continue composting when you can maintain suitable temperatures.
Finished worm compost works particularly well when mixed into the growing medium of vegetables, herbs, and flowers.
If you’re developing a backyard food garden, choosing suitable raised garden bed kits can also help you organize your growing space and put that homemade compost to good use.
Tip 1: Choose the Right Worm Bin and Location
Your first step is finding a container where composting worms can live comfortably.
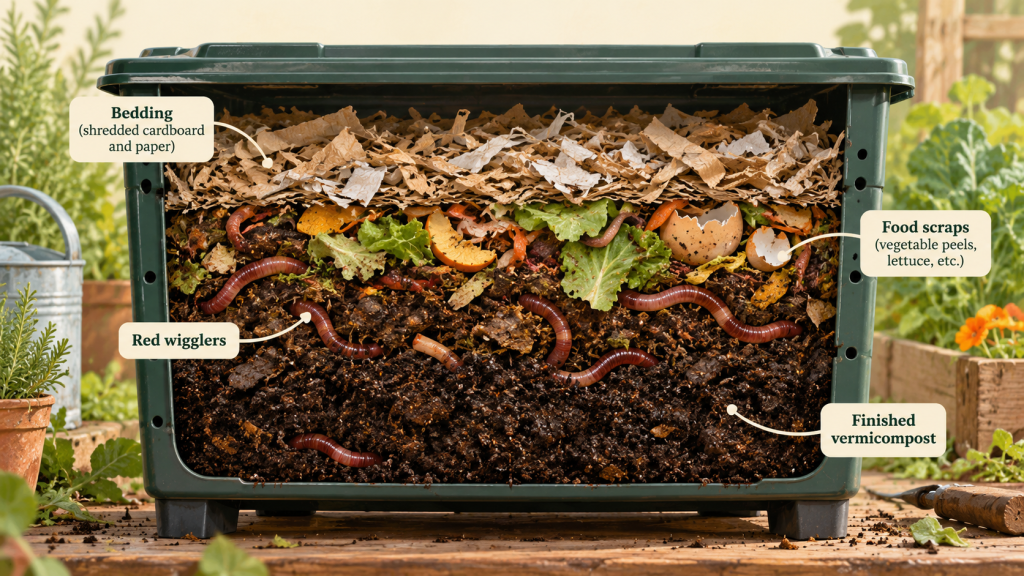
You can purchase a dedicated worm composter or make one from an opaque plastic storage tote. Both options work when the bin provides adequate ventilation and moisture control.
What Makes a Good Worm Bin?
A beginner-friendly container should have:
- Small ventilation holes to allow airflow.
- Suitable drainage to prevent standing water.
- A secure lid to discourage pests.
- Enough surface area for worms and bedding.
- Opaque sides that protect worms from light.
Choose a manageable container rather than starting with an oversized system.
Find a Comfortable Location
Place your bin away from direct sunlight, heavy rainfall, and extreme temperatures.
Red wigglers generally perform well around 55–77°F (13–25°C). A shaded shed, insulated garage, or sheltered utility space can work, depending on local conditions.
Avoid spots that become dangerously hot during summer or freeze in winter.
Tip 2: Start With the Right Composting Worms
Not every earthworm belongs in a compost bin.
The most commonly recommended species is the red wiggler (Eisenia fetida). These worms naturally live near the soil surface and thrive among decomposing organic materials.
Regular garden earthworms often prefer deeper soil and aren’t suitable substitutes for red wigglers in enclosed household bins.
How Many Worms Should You Buy?
A small starter population is enough to begin learning. Around 500–1,000 red wigglers can be suitable for a modest household setup, depending on bin size and expected food waste.
Buy from a reputable supplier that clearly identifies the species.
When your worms arrive, place them gently onto moist bedding and give them time to settle. Start with small feedings instead of immediately adding large quantities of scraps.
A healthy population can reproduce as conditions remain favorable, gradually increasing your bin’s processing capacity.
Tip 3: Prepare Comfortable Bedding
Worm bedding serves two important purposes: it creates a protective living environment and provides carbon-rich material for decomposition.
Common bedding materials include shredded cardboard, plain paper, coconut coir, and partially decomposed leaves.
Begin with approximately 4–6 inches of loosely packed bedding. Mixing several materials can improve airflow and reduce compaction.
Keep Bedding Moist, Not Soaked
Moisten the materials until they resemble a wrung-out sponge.
If you squeeze a handful, only a few drops of water should emerge. Bedding that drips continuously needs more dry material.
Add small amounts of water when the bin begins drying out. If it becomes soggy, mix in shredded cardboard to absorb excess moisture.
Avoid glossy paper, chemically treated materials, and anything that might expose your worms to harmful substances.
Tip 4: Feed Your Worms the Right Food Scraps
Feeding worms sounds simple, but overfeeding causes many beginner problems.
Start with small amounts and observe how quickly the scraps disappear. As your worms establish themselves, you can gradually increase their food supply.
What Can You Feed Composting Worms?
Suitable foods include:
- Vegetable trimmings and fruit peels.
- Coffee grounds and paper filters.
- Small quantities of plain bread or cereal.
- Finely crushed eggshells.
- Tea leaves or plastic-free tea bags.
Chopping scraps into smaller pieces helps microorganisms break them down more quickly.
Bury food beneath the bedding and alternate feeding spots to discourage fruit flies.
Foods You Should Avoid
Keep meat, dairy products, cooking oils, greasy leftovers, and pet waste out of household worm bins.
Limit highly acidic foods, including citrus peels, along with onions and heavily seasoned leftovers.
The Penn State Extension’s guide to feeding composting worms recommends introducing food carefully and avoiding materials that create odors or unfavorable bin conditions.
Remember, adding more food doesn’t automatically produce compost faster. Feed according to what your worms can process.
Tip 5: Maintain Your Bin and Harvest Castings
A healthy worm bin needs regular observation, but maintenance doesn’t have to become another demanding homestead chore.
Check the moisture, airflow, temperature, and remaining food every few days, especially while your system is new.
The bedding should feel damp, and the contents should have an earthy smell rather than a rotten odor.
When Is Vermicompost Ready?
Finished vermicompost usually takes several months to develop. Depending on your setup, harvesting may become possible after approximately three to six months.
Look for dark, crumbly material with an earthy smell and relatively few recognizable food scraps.
When you’re ready to harvest, gather the mature compost on one side of the container, then prepare the other side with new bedding and a fresh supply of food scraps. Over the next few weeks, the worms will gradually move toward the fresh food, making the compost easier to separate.
Collect the finished compost while leaving the worms behind to continue working.
Mix worm compost into garden soil or potting mix rather than assuming it should replace your entire growing medium.
Common Vermicomposting Problems and Solutions
Even well-maintained worm bins occasionally develop problems. Most issues are manageable once you identify the cause.
| Problem | Likely cause | Simple solution |
| Unpleasant odor | Excess food or moisture | Stop feeding temporarily and add dry bedding |
| Fruit flies | Exposed food scraps | Bury food completely |
| Worms escaping | Uncomfortable conditions | Check moisture, temperature, and airflow |
| Dry bedding | Insufficient moisture | Add small amounts of water |
| Slow composting | Cold temperatures or excess food | Adjust conditions and reduce feeding |
Don’t rush to empty your entire bin when something goes wrong.
Often, a small adjustment and a few days of observation will restore suitable conditions.
Essential Vermicomposting Supplies for Beginners
1. Worm Factory 360 Composting System
The Worm Factory 360 features stackable trays that allow worms to migrate toward fresh food while older compost becomes ready for collection.
It’s a useful option for homesteaders who want to expand their composting system without taking up much additional space.
Best for: Organized, expandable worm composting.
2. VermiHut Plus 5-Tray Worm Composter
The VermiHut Plus provides multiple composting trays in a compact vertical design. Its removable trays make adding bedding and accessing finished compost more convenient.
This system suits beginners who prefer a dedicated composter instead of building one themselves.
Best for: Small-space composting.
3. Uncle Jim’s Worm Farm Red Wiggler Composting Worms
These live composting worms provide a practical starting population for a new worm bin.
Check the species included, shipping conditions, and local temperature before purchasing. Some suppliers sell mixed worm populations.
Best for: Establishing a composting worm colony.
4. Urban Worm Coco Coir Bedding
Urban Worm Coco Coir offers a convenient bedding material that helps retain moisture while supporting a comfortable composting environment.
Mix it with shredded cardboard or paper to maintain a loose texture and improve airflow.
Best for: Preparing and refreshing worm bedding.
5. REOTEMP Worm Therm Composting Thermometer
The REOTEMP Worm Therm is designed to measure temperatures in worm composting systems.
It helps you check whether bedding temperatures remain suitable, especially when outdoor conditions change.
Best for: Monitoring worm bin temperatures.
Conclusion
Vermicomposting is a simple way to turn everyday kitchen scraps into something valuable for your homestead. Start with a suitable bin, choose red wigglers, prepare comfortable bedding, and feed your worms gradually. Keep their environment moist and well-ventilated, and you’ll have a reliable foundation for producing homemade compost. As your gardening efforts grow, you can use the finished compost to support vegetables and herbs in a small greenhouse growing setup or outdoor garden beds. Start small, observe your worms, and adjust as you learn. With patience, worm composting can become a rewarding part of your homesteading routine.
FAQs
1. How long does vermicomposting take?
Most beginner worm bins take approximately three to six months to produce their first substantial batch of finished compost. Temperature, feeding habits, and worm population influence the timeline.
2. Does vermicomposting smell bad?
A healthy worm bin should have a mild, earthy smell. Unpleasant odors usually indicate excess moisture, too much food, or inadequate airflow.
3. Can I use regular earthworms for vermicomposting?
Regular garden earthworms generally aren’t suitable for enclosed compost bins. Red wigglers are preferable because they thrive in decomposing organic materials near the surface.
4. How frequently should you add food to your worm bin?
Check the remaining food every few days and add small portions as needed. Wait until much of the previous feeding has decomposed before introducing more scraps.
5. Is indoor vermicomposting possible?
Yes. An appropriately maintained worm bin can work indoors when it has adequate ventilation, controlled moisture, and suitable temperatures. Choose a sheltered location where the bin won’t be exposed to strong sunlight or excessive heat.