How to Build a Backyard DIY Greenhouse for Less
We may earn a commission for purchases made using our links. Please see our disclosure to learn more.
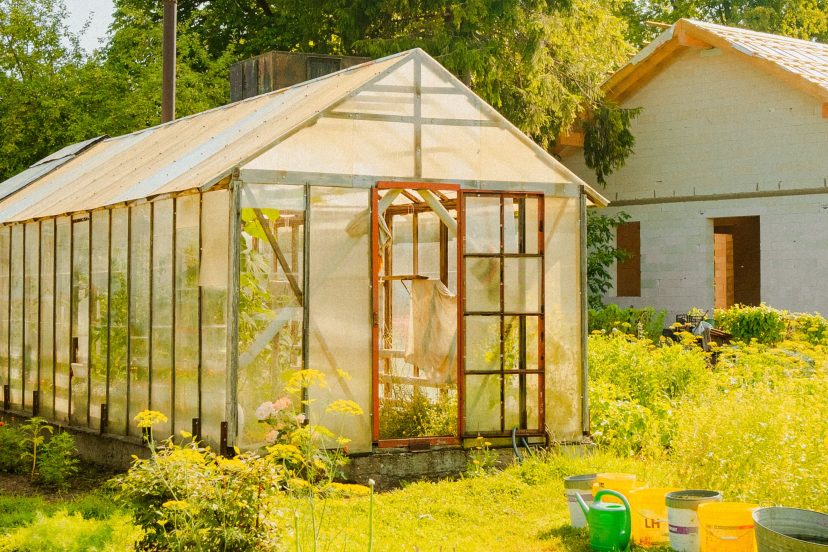
Building a greenhouse sounds costly, but it doesn’t need to be. If all you want is a covered field to raise seedlings, cultivate vegetables, or for a few extra weeks of harvest in the fall, a simple setup in your backyard can serve you well without breaking the bank. In this tutorial, you will learn how to build an affordable DIY greenhouse, from selecting a sunny site and materials for the frame through construction of the frame, the covering, and ventilation.
Why Build a DIY Greenhouse?
You have more control over when and how you grow in a greenhouse.
Wind, heavy rain, light frost, and drastic temperature changes are less of a threat to young plants. This added protection can be particularly helpful in early spring, when seedlings are still small and the outdoor weather can change quickly.
It also helps later in the season. Lettuce, spinach, kale, herbs and other cool-weather crops may continue to produce even after outdoor temperatures begin to fall.
Research on extending the garden growing season shows that protected structures can help gardeners grow for longer and provide some frost protection, depending on the setup and weather conditions.
For a homestead garden, that means more flexibility. You can start more plants from seed, protect food crops during unpredictable weather, and rely less on buying young plants every spring.
Choose the Best Backyard Location
Greenhouse location is as important as greenhouse construction.
A sturdy framework and good quality plastic will be of little use if the greenhouse is located in shade for the majority of the day.
Choose a location that will receive at least a few hours of direct sunlight, particularly in the morning and early afternoon. The site should drain well, too—water standing around the base can turn the place into a muddy mess and can also reduce the life of wood materials.
Consider convenience when you are selecting the site.
A greenhouse that sits close to your hose, garden beds, compost pile, or potting area will be easier to use every day. Carrying trays, tools, and watering cans across the whole yard gets old quickly.
The University of Georgia’s greenhouse planning guidance recommends looking at sunlight, drainage, nearby trees and buildings, and wind exposure before choosing a location.
It helps to watch the area at different times of day before you commit. A patch that looks sunny at noon may sit in the shadow of a fence or shed for half the morning.
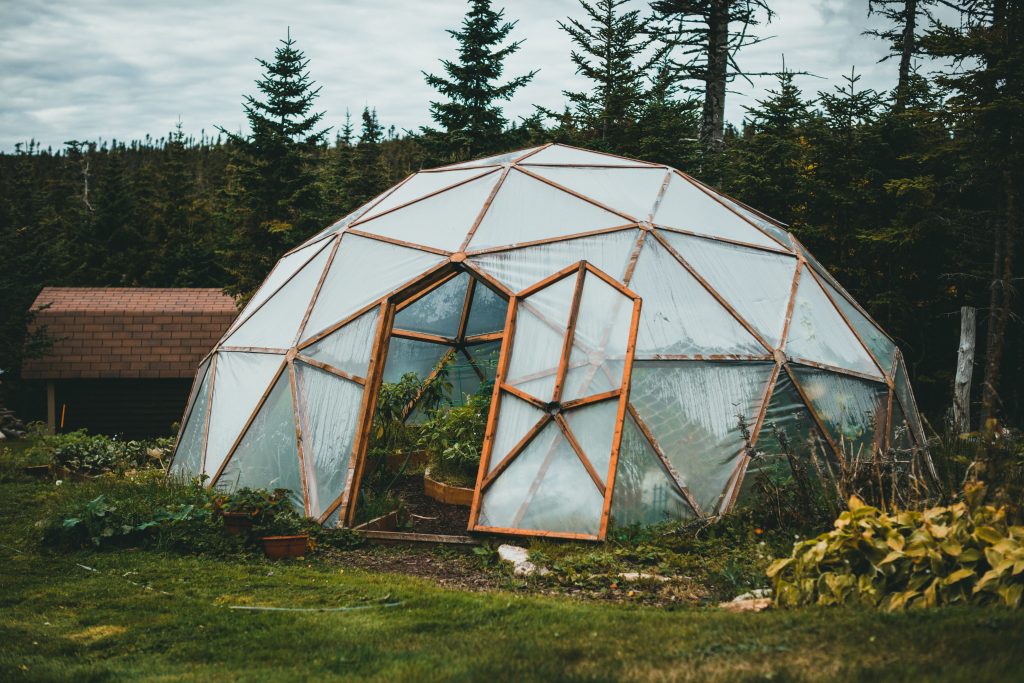
Pick a Simple, Affordable Greenhouse Design
Your first greenhouse does not need a complicated design.
Simple structures are usually easier to build, cheaper to repair, and easier to change later.
Wood-Frame Greenhouse
A wood-frame greenhouse works well if you want straight walls, a proper doorway, and solid places to attach shelves, hooks, or vents.
It usually costs more than a basic hoop house, but it also feels more permanent. If something breaks, repairs are usually straightforward.
Leftover lumber from another project can bring the cost down, as long as the boards are still sound and not badly warped or rotten.
Hoop Greenhouse
A hoop greenhouse is one of the easiest designs to build on a tight budget.
PVC pipe or metal conduit is bent into arches over a wooden base or ground anchors. Greenhouse plastic is then stretched over the frame.
The curved roof helps rain run off instead of pooling overhead, and the open interior gives you plenty of growing space without much complicated framing.
Research on low-cost season-extension structures also points to PVC and conduit as common materials for simple protected growing setups.
PVC is cheap and easy to work with, although years of sun and weather exposure can eventually make it brittle.
If your DIY total starts getting close to the price of a complete structure, compare it with a few budget-friendly greenhouse kits for home growing. Building from scratch may still save money, but sometimes a basic kit ends up being close enough in price that the time savings make it worthwhile.
Materials You’ll Need
For a basic hoop-style DIY greenhouse, the materials list can stay fairly short:
- Pressure-treated lumber for the base
- PVC pipe or metal conduit
- Rebar stakes or strong ground anchors
- Greenhouse-grade polyethylene film
- Exterior screws
- Pipe straps or brackets
- Lumber for the doorway
- Hinges and a latch
- Greenhouse repair tape
- Gravel, mulch, or landscape fabric
One place I would not cut corners is the covering.
Ordinary thin plastic sheeting may look fine at first, but it is not made to sit outside in direct sun for months at a time. It can become brittle, cloudy, or tear much sooner than greenhouse film.
Greenhouse-grade polyethylene is made for outdoor growing structures. UV-treated 6-mil film is a common choice because it is flexible, fairly affordable, and better suited to long-term sun exposure.
How to Build a Backyard DIY Greenhouse
1. Prepare the Ground
Mark out the size of your greenhouse first.
Clear away tall grass, weeds, rocks, sticks, and anything sharp that could damage the plastic later.
You do not need a concrete foundation for a lightweight hoop greenhouse. Still, leveling obvious bumps and low spots will help the frame sit evenly.
If the area gets muddy after rain, landscape fabric with gravel on top can make the floor much easier to walk on.
2. Build and Anchor the Base
Build a rectangular base from sturdy boards and fasten the corners securely.
Then anchor it to the ground.
This can seem unnecessary when the weather is calm, but a greenhouse covered in plastic catches a surprising amount of wind. Once a strong gust gets underneath it, a lightweight structure can shift or lift.
Rebar, ground stakes, or another solid anchoring system will help keep it in place.
3. Install the Hoops
Place rebar stakes or suitable anchors at even intervals along both long sides of the base.
Slide one end of the PVC pipe over a stake, bend it gently across the greenhouse, and fit the other end over the matching stake.
Repeat until all the hoops are in place.
Add a ridge pole along the top once the arches are standing. This helps keep everything lined up and gives the frame more stability from front to back.
4. Frame the Door
Build a simple doorway at one end.
You do not need a heavy exterior door. A lightweight wooden frame covered with greenhouse plastic is easier to install and works well for most backyard builds.
Make the opening wider than you think you need.
Once you start carrying seed trays, bags of soil, watering cans, and tools inside, a narrow doorway becomes annoying very quickly.
5. Add the Greenhouse Plastic
Pick a calm day for this part.
Pulling a large sheet of greenhouse film over a frame while the wind is catching it is difficult and usually leads to uneven tension.
Drape the film over the structure, center it, and secure it gradually from one side to the other.
The plastic should be smooth and fairly tight, but it does not need to be stretched as tight as possible. Too much tension can put extra stress on the attachment points.
Leave enough extra material around the bottom so you can secure the edges properly.
6. Add Ventilation
Ventilation needs to be part of the original build.
Even a small greenhouse can heat up quickly on a sunny day, and the temperature inside can climb well beyond what your plants can handle.
At minimum, include a large door and another opening on the opposite end so air can move through the structure.
Research on passive solar greenhouse temperatures found that greenhouse interiors can become much hotter than outdoor conditions during summer, even when roof vents are used.
A simple thermometer inside the greenhouse can help you catch heat problems before plants start wilting.
Recommended Products for a DIY Greenhouse
You do not need a pile of special equipment, but a few practical products can make the greenhouse easier to manage and help the materials last longer.
1. Farm Plastic Supply 4-Year UV-Resistant 6-Mil Greenhouse Plastic
This is one item where using the right material makes a noticeable difference. UV-resistant greenhouse film is made for outdoor exposure and usually lasts much longer than regular plastic sheeting. Measure your frame carefully before ordering so you have enough material to cover the roof, sides, and ends.
2. Govee Bluetooth Thermometer Hygrometer
Temperature can change quickly inside a greenhouse. A thermometer and humidity monitor helps you see when the space is getting too hot or too humid. A Bluetooth model can also show recent temperature changes, which is useful if you are away from the greenhouse for part of the day.
3. Palram Canopia Automatic Roof Vent Opener
If your greenhouse has a compatible roof vent, an automatic opener can take some of the work out of temperature control. It opens as the temperature rises and does not need electricity, so it can keep air moving even when you are not outside checking the greenhouse.
4. Agfabric 40% Shade Cloth
Shade cloth becomes useful when summer sun starts pushing temperatures too high. A 40% shade level cuts some direct sunlight without making the greenhouse too dark, and the woven material still allows air to move through.
5. UV-Resistant Greenhouse Repair Tape
Keep a roll somewhere easy to reach. Small tears in greenhouse film are much easier to fix when you catch them early. Leave one through a windy day, and it can turn into a much bigger repair.
Conclusion
A backyard DIY greenhouse doesn’t have to be costly or elaborate to be beneficial. Keep the size manageable, place it in a sufficiently sunny location, anchor the frame securely, and use greenhouse-grade covering – not cheap utility plastic. Venting and temperature control are more important than decorating or adding gadgets. With those basics covered, even a modest greenhouse can extend your seed-starting season, shield crops from erratic weather, and lengthen your garden’s productivity each year.
FAQs
How cheap can you build a DIY greenhouse?
It depends on the size and the materials you use. A small hoop greenhouse made with PVC or conduit and greenhouse film is usually one of the cheapest options. Using leftover lumber, shelving, gravel, or other materials can bring the cost down further.
Is PVC safe to use for a greenhouse frame?
Yes. PVC is commonly used for small hoop greenhouses because it is lightweight, inexpensive, and easy to bend. Sun and weather can make it brittle over time, so check the frame occasionally for cracks or weak spots.
What plastic should I use for a DIY greenhouse?
Use greenhouse-grade polyethylene instead of ordinary household plastic sheeting. UV-treated 6-mil greenhouse film is a popular choice because it holds up better outdoors while staying flexible and relatively affordable.
Does a greenhouse need ventilation?
Yes. Ventilation helps remove excess heat and humidity and brings fresh air into the greenhouse. Doors, end vents, side openings, or roof vents can all help keep temperatures from climbing too high.
Can I use a DIY greenhouse during winter?
Yes, but an unheated greenhouse has limits. Cold-tolerant crops may do well with some extra protection, while tender plants can still be damaged during freezing nights. Row covers, insulation, or supplemental heat may be needed in colder weather. Add a realistic budget breakdown.