How to Make Sauerkraut — A Homestead Pantry Staple

We may earn a commission for purchases made using our links. Please see our disclosure to learn more.
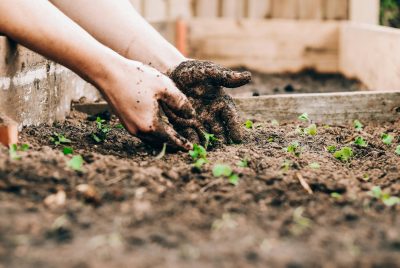
Making sauerkraut at home is one of the simplest ways to preserve cabbage and build a more self-sufficient pantry. With just cabbage, salt, and a clean jar, you can create a tangy fermented food that stores well and adds bright flavor to everyday meals. In this guide, you’ll learn how to make sauerkraut step by step, what tools you need, how fermentation works, and how to avoid common beginner mistakes.
What Is Sauerkraut?
Sauerkraut is fermented cabbage — but the process behind it is worth understanding.
When you mix shredded cabbage with salt, the salt draws moisture out of the cabbage and creates a natural brine. As the cabbage remains covered by its brine, beneficial bacteria begin turning its natural sugars into tangy lactic acid. That acid gives sauerkraut its tangy flavor and acts as a natural preservative.
The National Center for Home Food Preservation recommends using firm, fresh cabbage and starting your batch within 24 to 48 hours of harvest, using 3 tablespoons of canning or pickling salt per 5 pounds of cabbage.
Why Sauerkraut Belongs in Every Homestead Pantry
Long before refrigeration, fermentation was how families kept vegetables edible well past harvest season. It’s a practical, low-waste tradition that fits naturally into a homesteading lifestyle — especially when you’re looking for ways to use up a surplus of garden cabbage.
Homemade sauerkraut also tastes noticeably better than store-bought. It’s brighter, crunchier, and more flavorful. You control the salt level, the fermentation time, and any add-ins you want to experiment with. If you already make your own bread, broth, or pickles, sauerkraut is a natural next step.
The Simple Science Behind Fermentation
Cabbage naturally carries microbes on its surface. When you add salt and keep the cabbage submerged under brine — away from oxygen — you create an environment where lactic acid bacteria thrive and slowly acidify the cabbage.
Salt plays a critical role here. It draws out moisture, encourages the right fermentation environment, and discourages spoilage. Ohio State University Extension notes that the salt ratio in sauerkraut is important for food safety and shouldn’t be casually adjusted.
So while sauerkraut is simple to make, it does require a little precision. Measure your cabbage and salt properly, keep everything clean, and make sure the cabbage stays under the brine throughout fermentation. Those three habits will carry you through most batches without issue.
What You Need to Make Sauerkraut
- Fresh cabbage
- Canning or pickling salt (not iodized table salt)
- Large mixing bowl
- Sharp knife, mandoline, or cabbage shredder
- Clean glass jar or fermentation crock
- Fermentation weight
- Clean cloth, lid, or airlock top
Iodized salt is worth avoiding because the additives can cloud your brine and interfere with fermentation. For a beginner batch, 5 pounds of cabbage and 3 tablespoons of salt is a practical starting point — enough to ferment well without taking over your counter space.
How to Make Sauerkraut Step by Step
Step 1: Choose Fresh Cabbage
Start with firm, heavy heads of cabbage. Fresh cabbage holds more moisture, which is what creates your brine. Remove any wilted outer leaves, rinse under cool running water, cut into quarters, and remove the core.
Green cabbage is the traditional choice, but red cabbage works just as well and produces a beautiful deep-colored kraut that looks lovely in the jar.
Step 2: Shred the Cabbage
Slice the cabbage into thin, even shreds — roughly the thickness of a quarter, as recommended by the National Center for Home Food Preservation. A sharp knife works well for smaller batches. If you plan to make sauerkraut regularly, a mandoline or cabbage shredder will save you time and give you more consistent results.
Place the sliced cabbage in a roomy mixing bowl.
Step 3: Add Salt
For every 5 pounds of cabbage, add 3 tablespoons of canning or pickling salt. Sprinkle it evenly over the cabbage and mix it thoroughly with clean hands. Even distribution matters here — you don’t want pockets of undersalted cabbage sitting in your jar.
The cabbage will feel dry and stiff at first. Give it a few minutes and the salt will start drawing out moisture.
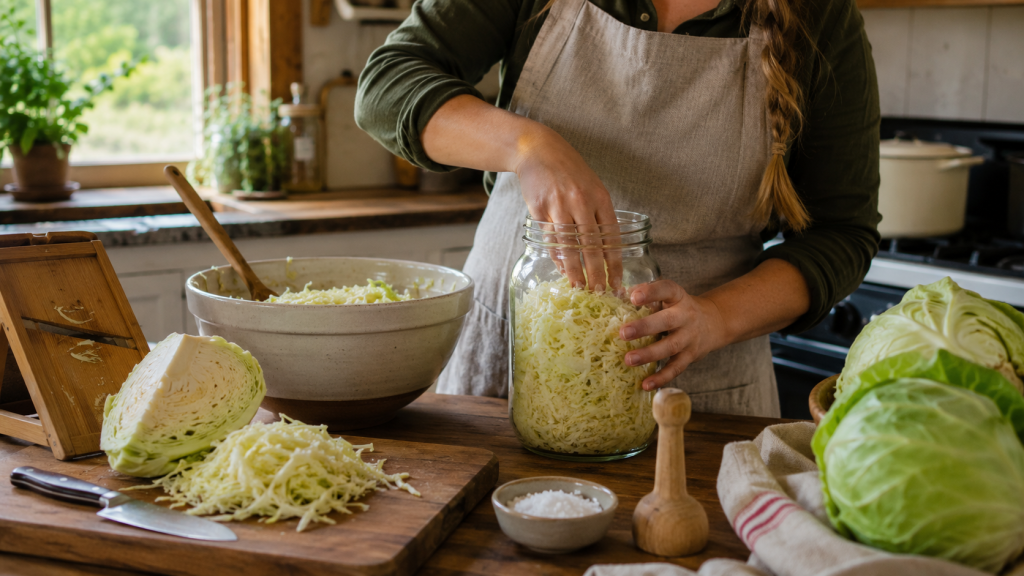
Step 4: Massage and Pack
This is where things get hands-on. Massage, squeeze, and work the cabbage for several minutes until liquid begins pooling at the bottom of the bowl. That liquid is your brine.
Pack the cabbage firmly into a clean jar or crock, pressing it down as you go to eliminate air pockets and encourage the brine to rise above the cabbage. A sauerkraut pounder makes this easier, but a clean fist gets the job done in smaller jars.
Step 5: Keep the Cabbage Under Brine
This step matters more than any other. The cabbage must stay fully submerged under the brine for the entire fermentation period. Any cabbage sitting above the liquid has contact with air, which creates conditions for mold and spoilage.
Use a fermentation weight, a small jar filled with water, or a brine-filled food-safe bag to keep everything pressed down. If your cabbage doesn’t release enough liquid to cover itself, the National Center for Home Food Preservation recommends topping it off with a boiled and cooled brine made from 1½ tablespoons of salt per quart of water. Then cover the container with a clean cloth, fermentation lid, or airlock.
Step 6: Let It Ferment
Place the jar in a cool spot away from direct sunlight. The ideal temperature range is 70°F to 75°F, where sauerkraut typically finishes in 3 to 4 weeks. In a cooler room — around 60°F to 65°F — expect it to take 5 to 6 weeks. Below 60°F, fermentation slows significantly. Above 75°F, the kraut can turn soft and mushy.
Look over the jar every few days and confirm the cabbage is still fully covered by brine. If you notice bubbling, that’s a good sign — fermentation is underway.
Step 7: Taste and Store
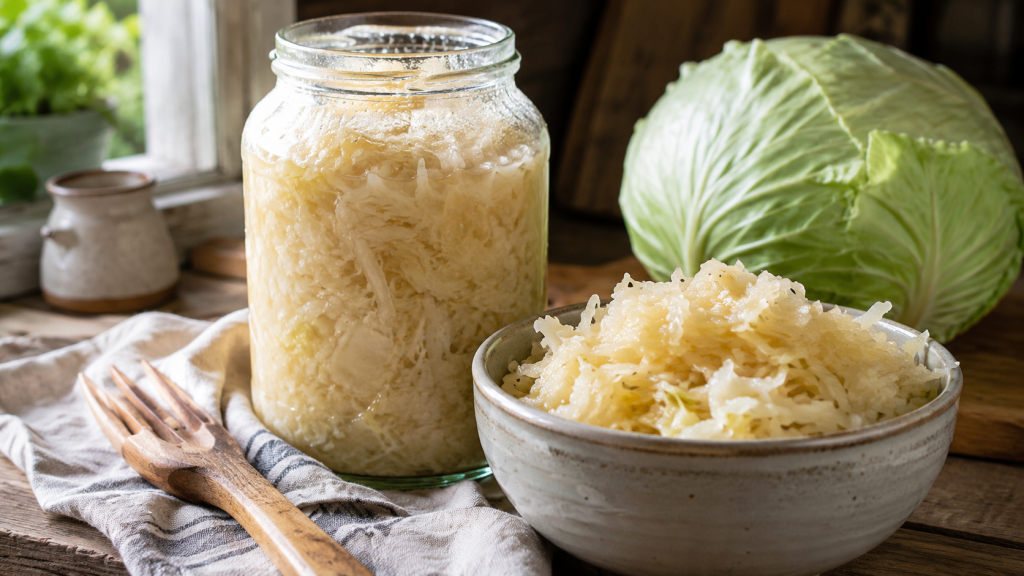
Start tasting around the two-week mark. Some people prefer a mild, lightly sour kraut. Others like it bold and tangy. Taste every few days until it reaches the flavor you’re after, then transfer it to the refrigerator. Cold temperatures slow fermentation and help preserve the texture.
According to the National Center for Home Food Preservation, fully fermented sauerkraut stored in the refrigerator and kept tightly covered can last for several months.
Easy Flavor Add-Ins for Homemade Sauerkraut
Once you’ve made a basic batch, it’s worth experimenting with flavors. Popular add-ins include caraway seeds, garlic, shredded carrots, juniper berries, dill, ginger, turmeric, thinly sliced onion, and apple slices.
That said, keep your first batch plain. Getting familiar with what proper fermentation looks, smells, and tastes like will make you a more confident fermenter before you start layering in other flavors. After that first batch, the experimentation is half the fun.
How to Use Sauerkraut in Everyday Meals
Sauerkraut goes with way more than sausages. Try it alongside fried eggs and potatoes, in grain bowls or rice bowls, on sandwiches or grilled cheese, with roasted pork, stirred into bean soups, on tacos, or on venison, chicken, or turkey burgers.
One tip: add it after cooking when you can. Heat can soften the texture and may reduce the live cultures in unpasteurized kraut.
My favorite quick lunch is sourdough toast with scrambled eggs, a spoonful of sauerkraut, and cracked pepper. Fast, filling, and it actually feels intentional.
For more self-sufficient pantry inspiration, you can also explore these DIY natural cleaning products for a cleaner homestead using simple, everyday ingredients.
Conclusion
Learning how to make sauerkraut is one of the more rewarding additions to a homestead pantry. It requires very little equipment, uses basic ingredients, and turns fresh garden cabbage into something that stores well and adds real flavor to everyday meals. Measure your salt carefully, keep the cabbage under the brine, and give it enough time — and you’ll have a reliable batch every season. Once it becomes part of your routine, it’s hard to imagine the pantry without it.
FAQs
1. How much time does sauerkraut need to ferment?
Usually 3 to 4 weeks at 70°F to 75°F. In a cooler room, expect 5 to 6 weeks. Use a fermentation weight or another clean weight to keep the cabbage fully below the brine.
2. Can I make sauerkraut without a fermentation crock?
Yes — a wide-mouth mason jar works great for small batches. Make sure to use a clean weight so the cabbage stays fully submerged in the brine.
3. What kind of salt is best for sauerkraut?
Canning or pickling salt. Avoid iodized table salt — the additives can cloud the brine and affect fermentation.
4. Why is my sauerkraut not making enough brine?
The cabbage might be older and less juicy. Keep massaging and packing it down. If it still won’t produce enough liquid, top it off with boiled and cooled brine (1½ tablespoons salt per quart of water).
5. Is homemade sauerkraut good for gut health?
Unpasteurized sauerkraut may contain live lactic acid bacteria, and research on fermented cabbage points to potential gut health benefits. It’s also high in salt, though, so enjoy it in reasonable amounts.